
The Essential Guide to Using Tile Spacers: A Step-by-Step User Manual
When it comes to tiling projects, precision is key. Whether you're a seasoned DIY enthusiast or a novice embarking on your first home improvement venture, understanding the importance of tile spacers is crucial. These small, often underestimated tools play a significant role in ensuring your tiles are perfectly aligned, resulting in a professional-looking finish. In this step-by-step user manual, we'll explore the ins and outs of tile spacers and how to use them effectively for a flawless tiling job.
Understanding the Basics: What Are Tile Spacers?
Tile spacers are small, usually cross-shaped or T-shaped, pieces made of plastic or rubber. Their primary purpose is to create consistent gaps between tiles, allowing room for grout. These gaps ensure that tiles are evenly placed, providing a neat and uniform appearance to your surface.
Step 1: Gather Your Materials
Before you begin your tiling project, make sure you have all the necessary materials on hand:
- Tiles
- Tile adhesive
- Tile spacers
- Tile cutter or saw
- Spirit level
- Grout
- Grout float
Step 2: Prepare Your Surface
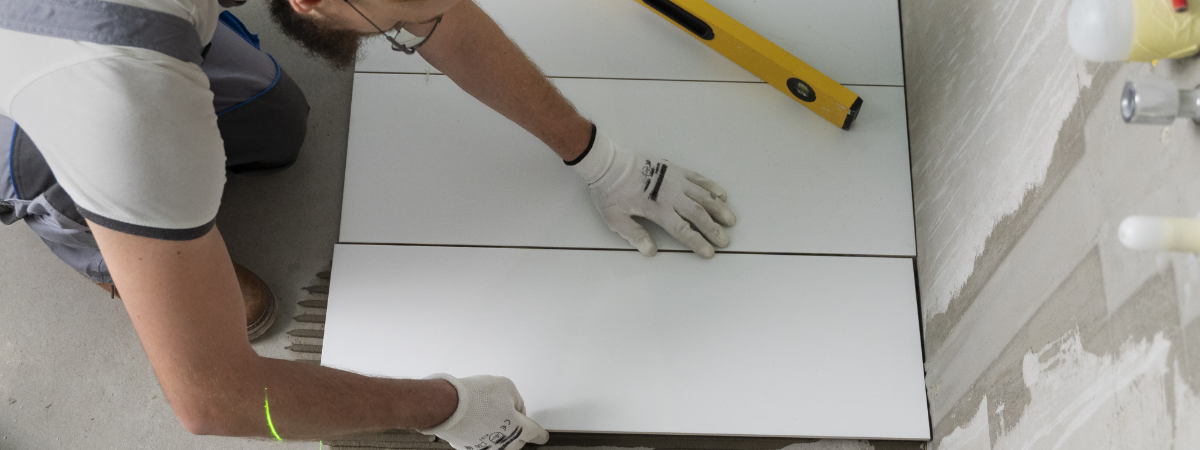
Ensure the surface where you're installing the tiles is clean, dry, and smooth. Use a spirit level to mark a horizontal and vertical guideline, ensuring your tiles will be laid evenly.
Step 3: Placing the Tiles
- Apply Tile Adhesive: Spread a layer of tile adhesive using a notched trowel, following the guidelines you marked earlier.
- Insert Tile Spacers: As you lay each tile, place tile spacers at each corner. This will create even gaps between the tiles.
- Press Tiles Firmly: Press the tiles into the adhesive, making sure they align with the guidelines and fit snugly against the spacers.
- 4. Adjust if Necessary: If a tile isn't aligned correctly, gently adjust it before the adhesive sets.
Step 4: Grouting
Once the adhesive has dried and the tiles are firmly in place, it's time to remove the spacers and apply grout.
- Remove Tile Spacers:Carefully remove the tile spacers from between the tiles.
- Apply Grout: Using a grout float, spread the grout over the tiles, pressing it into the gaps. Wipe off excess grout from the tile surfaces with a damp sponge.
- Finishing Touches:After the grout has dried, buff the tiles with a dry cloth to remove any haze and reveal the beautiful, finished look.
Step 5: Clean Up and Admire Your Work
Clean any remaining grout residue from the tiles, and step back to admire your perfectly spaced and professionally tiled surface.
With the right technique and attention to detail, using tile spacers can transform your tiling project from amateur to expert. Remember, patience and precision are your best friends in any tiling endeavor. Happy tiling!

